Description
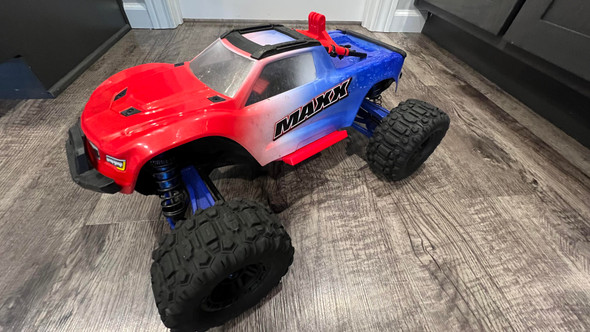
Transform your X-Maxx with our sleek wing mount kit — the perfect finishing touch for a standout build. Designed for straight-forward installation while weighing under a pound (more than half of which is the XRT Wing itself). This durable mount kit lets you run a full-size XRT wing with a clean, aggressive look that will help bring your setup together.
*XRT Wing (TRA7821) & CARBON FIBER WINGS SOLD SEPARATELY*
**Package Includes** - ALL MOUNTS WILL BE SAME COLOR
- 1x 3DA Tailgate Base
- 1x 3DA X-M Wing Mount
- 1x 3DA Wing Mount Brace
- Installation Hardware
Installation Guide
Tools & Parts Needed:
- 1/8" drill bit
- 2.5mm Hex Bit
- XRT Wing (TRA7821)
- 5.5 mm & 7mm Hex Bit(s) or Pliers (optional)
Included Hardware:
- M3x20 Screws + M3 Locknuts = 4x
- M4x12 Screws + M4 Locknuts = 8x
- M4x35 Screws = 4x
- M4x25 Screws = 2x
Step 1: Remove Stock Tailgate Protector
Remove the factory X-Maxx tailgate protector (Part #TRA7712). You won’t need the exterior piece or its screws, so set them aside.
Step 2: Modify Inner Tailgate Piece
Cut or split the inner section of the tailgate protector as shown in the photos (Cut should be approx. 115mm centered). Do not cut the body itself. Set the center section aside.
Step 3: Install Tailgate Base
Align the 3DA tailgate base with the peg holes in the X-Maxx body. Using the two interior end pieces from Step #2, Secure 3DA Tailgate base in place using the provided M3x20 screws and M3 nuts. (screw orientation up to user)
**Verify Tailgate is secured 100%(no gaps) to body before moving to Step 4**
Step 4: Drill Mounting Holes
You’ll see 5 pre-marked holes in the 3DA tailgate base that align with the X-Maxx body (2 on top and 3 on the rear). Use a 1/8" drill bit to carefully drill out each of these holes.
Step 5: Attach Wing Mount
Align the holes in the wing mount with those on the tailgate base (Refer to photos for orientation). Secure them together using the included 5x M4x12 screws and M4 nuts:
- 2 screws go upward and outward (Last two photos)
- 3 screws go in from the rear (Last two photos)
Tip: Use a 7mm hex bit or pliers to hold the interior M4 nuts in place during installation(refer to photos).
Step 6: Drill & Install Wing Mount Brace
Separately, take the 3DA Wing Mount Brace & angle it onto the rear bumper of the X-Maxx(expect a wrap around/snug fit). Similar to STEP 4, Use a 1/8" drill bit to carefully drill out each of the holes on the bumper itself. Secure the brace using the included M4X25 Screws and M4 Locknuts.
Step 7: Mount XRT Wing
Attach your XRT wing to the wing mount using the provided M4x35 screws. Tighten securely. Enjoy!
If you experience locknuts pushing out/rotating during installation, backtrace screws, re-insert the locknuts and re-try again slowly!
What separates us from the competition? Simple, we use state of the art technology and years of expertise to ensure the best quality and strength for you! We design and test our mounts to ensure the best durability. Always taking custom requests! If you don't see it, let us know and we can work towards turning your idea into a reality!


